Preview a local image using Backbone and HTML5 JavaScript
18 Jan 2012HTML5 + Backbone.js make a great partnership! In this blog post, I am going to show how to preview an image in the browser without having to touch the server. I’ll also use Backbone.js to demonstrate how developers can update a Backbone model with image data and refresh the view to in order to display a preview of the image.
Backbone Templates
Backbone Templates allow developers to build re-usable layouts that can be instansiated within Backbone Views. For this example application, we will need two templates: one for the preview and one for selecting (and later saving) a new image file. Here is the HTML:


Backbone Views
Backbone Views have the responsibility of initializing and rendering the templates into the DOM so that they are visible on the screen. They can also include data from the model. In the templates above, only one requires data from the model; preview-image-template. This is also, in fact, the most basic view in this example, so let’s look at that first:
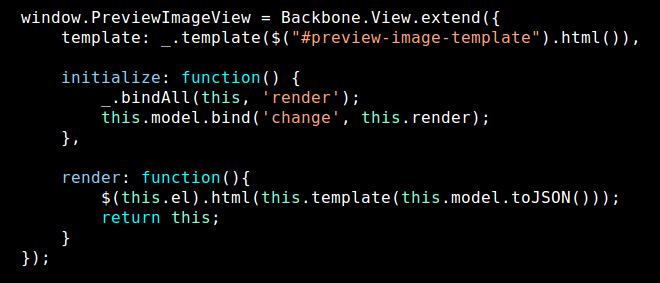
I won’t go into too much detail about what is happening here with the Backbone View but instead I want to focus on the task at hand; to load a preview of the selected image file. The main code to take notice here is the following call to bind in the initialize function:
this.model.bind('change', this.render);This binds the change event on the model to call the render method on this view. The result will be that whenever any attribute on the model changes, the render method on this view will be called, resulting in the display being updated. But with what? Let’s continue to build the application with the SelectImageView shown below:
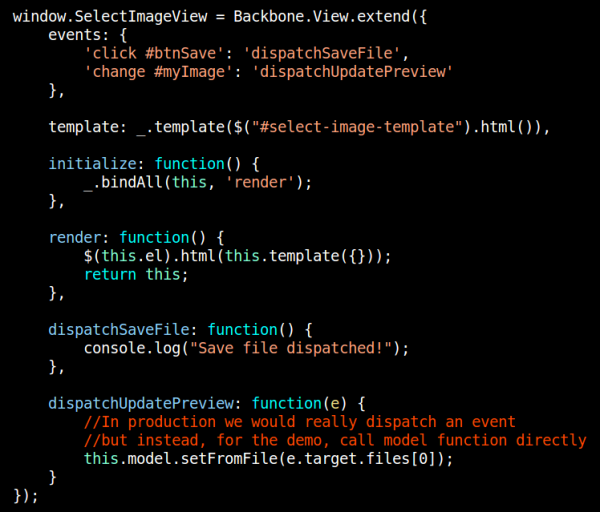
In this View I am binding to some DOM events which I am then passing onto View dispatch functions. I prepended these functions with dispatch because in a Production application environment developers would usually trigger custom events which would then be bound by Backbone Models or Views. In this case, I am cheating a little for simplicity and clarity and simply calling the setFromFile function directly on the model. This model, by the way, is exactly the same instance of the model that is bound to the PreviewImageView (see the bootstrap.js file description below to see how developers can set the model attribute on a Backbone View).
Backbone Models
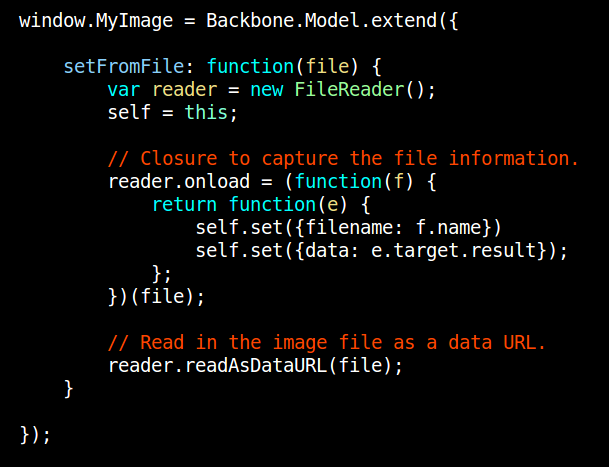
This is by far the most interesting part of the application! There is only one model and so this is where we need to define our setFromFile function used in the view earlier. This function will use the new HTML5 FileReader object to read the data from the selected file and update the data attribute on the model with the raw data from the file. As you would have guessed by now, this fires a change event on the model which in turn causes the PreviewImageView to call render and we should see the new image appear on the screen!
Backbone Router and bootstrap.js
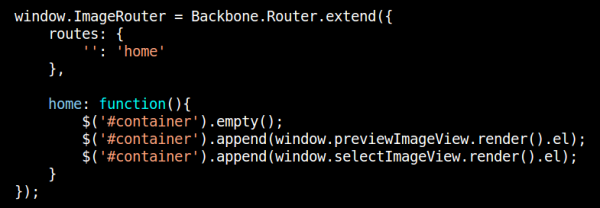
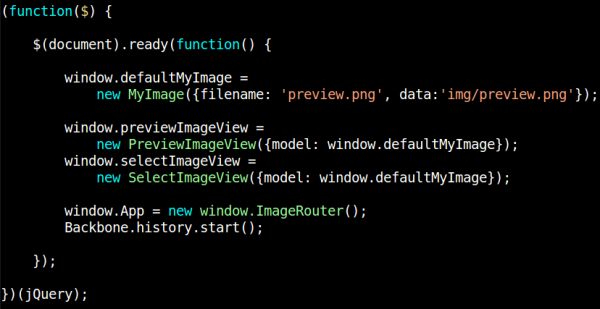
For completeness, here is the code for this applications Backbone Router and the bootstrap.js code that kicks everything off. The router does nothing unusual but bootstrap.js deserves a little explanation.
I want the application to load in a state where we see a default image ‘preview.png’. This can be achived by setting the model with default attributes of filename = ‘preview.png’ and data = ‘img/preview.png’. This can also be done directly with the model definition too using defaults. Next I create both views and set the model property on each using the same model. As mentioned above, in Production, we would only set the model property on the PreviewImageView and use events to notify of any changes. Finally we create the Backbone Router and start the application!
Here is the code for the Backbone Router and bootstrap.js:
